Today when I start a new project, I use every time the possibility to create it over the CLI because every new framework comes with functionality like this. I like it because it makes the start of every project or creating a fast prototype very easy and stable. Some of them also have the option to choose your favorite linter, preprocessor and more.
But what is after the project is created? Then we use most of the time our coding standards or templates. One is working with BEM the other works with CSS-in-JS or one big file versus separation of concern and split template, design, and logic into different files. And of course, today we all creating components. This means, after the project is created, we have our own workflow to go on and do a lot of copy & paste to create new components.
Here hygen can help you and will be your next best friend. It is a code generator that is very easy to configure and you can use it in every framework or project you want. On the homepage, you find some examples for react, redux, react native and Express. Today I will show you an example of how I use it for my Vue.js projects.
Install hygen
There are three ways to do it.
With brew:
brew tap jondot/tap
brew install hygen
Globally with npm (or yarn):
npm i -g hygen
Or, if you like a no-strings-attached approach, use with npx
npx hygen ...
Create a simple Vue project
vue create hygen-tutorial
The requirement here is of course that you had installed vue-cli. By asking for a preset, you can choose the default (babel, eslint). This will create a very simple Vue application which looks like this

hygen “init” to start
Go into your project with
cd hygen-tutorial
Please run the following command to initial Hygen in your project that you can use it there
hygen init self
Now, hygen created some folders and files in your root source in a folder named _templates. Hygen created two helpers which will save you time to build your generators.

The two helpers are:
hygen generator new geneatorName— builds a new generator for youhygen generator with-prompt geneatorName— the same as before, only this one will be prompt driven
Standard Vue component
Ok, now let us create our first generator with hygen! Like in the beginning I mentioned, we will create here a generator that helps us to create very easy a new component for our Vue project to make our lives easier later during the development.
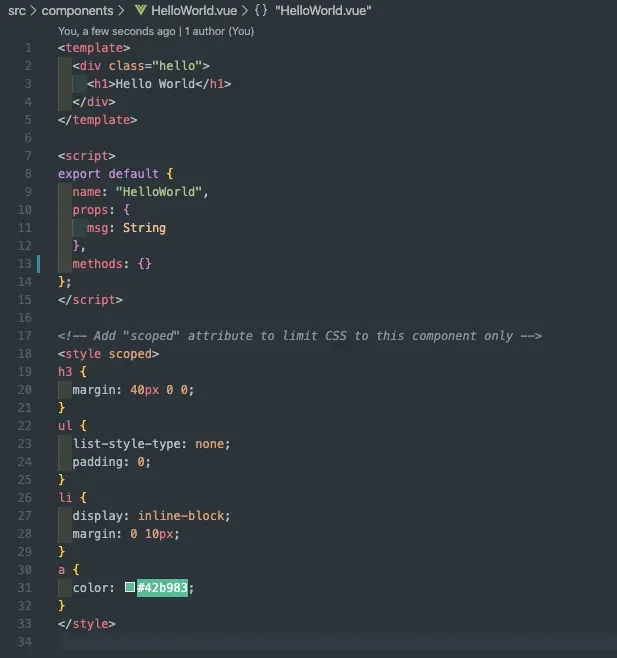
To know what we need, we will check first our sample HelloWorld component from our Vue project.
For this tutorial, I removed a lot from the standard template section to make it cleaner. Because in the end, we must only know which sections we need. And we need 3 sections for a new Vue component.
- A template section which you will find surrounded with the tag
<template></template> - A script section where you will write your component logic like props, methods and more. This section is surrounded by the tag
<script></script> - A styling section where you will write your CSS which is surrounded with the tag
<style></style>
Create our first generator
The first generator will do a very simple thing for us. It should generate a file that has a structure like our HelloWorld component.
To build our first generator with hygen we need to call
hygen generator new vue-component
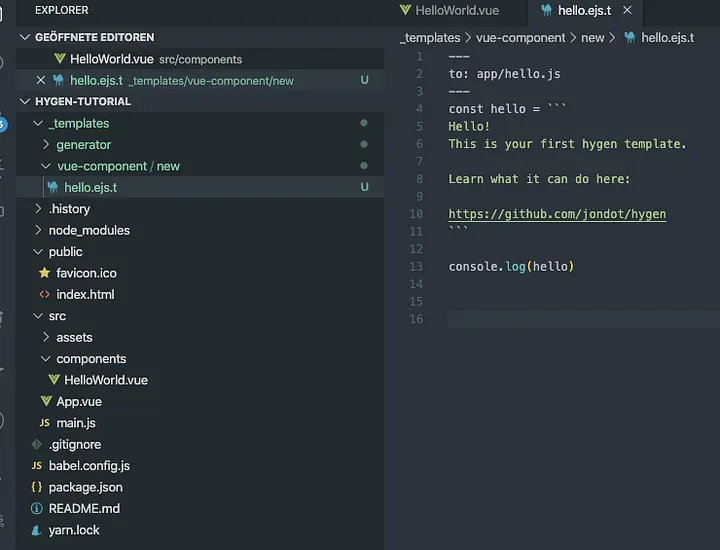
What we did here? We say hygen, please create a new generator with the name vue-component. hygen build now at our root source in the _template folder a new template file which named hello.ejs.t into a folder /vue-component/new

Awesome. That’s all. You created now your first generator! Congratulations! The new file hello.ejs.t should look like this
Use our new generator and build a new Vue-component
Now you will think: “What is this code doing?”. One of my best advice is learning by doing! After this, you will understand the code and the logic behind it very easily. To use or new generator to create a new Vue-component for our project, you must call
hygen vue-component new

Now the magic will start and hygen will run the hello.ejs.t file in your path /_templates/vue-component/new/. Maybe you see it already but the command uses the same structure as you have in your project. Means, when you want to change the command later, you must only rename the folder in new in maybe build. Then you can call hygen with
hygen vue-component build

You see, the same things were generated after renaming the folder new into build. And what happened after call the new generator? A file named hello.js was created in a folder /app that is in our root source.
But what is in that file hello.js?
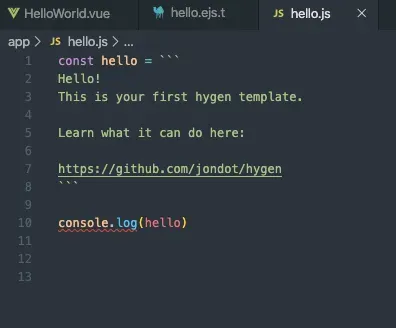
Ok, not so much. But where it is coming from? We didn’t set up anything and why our generator created a new folder /app with a file hello.js in it?
Edit our new template file
Now we dive into the real magic of hygen ;-) This is our created file hello.ejs.t when we build our first generator
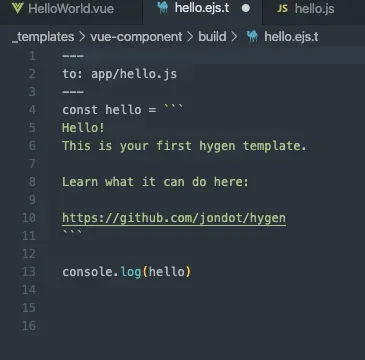
We can split this file into two sections:
- head — between the ---
- body — All below the head
I marked it here as yellow for the head and purple for the body
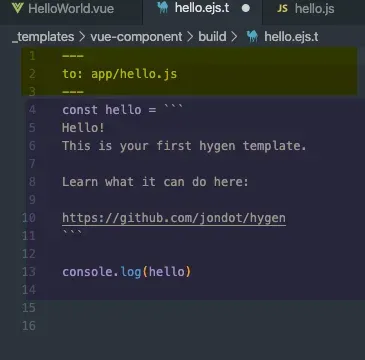
In the head, you can find the frontmatter section like hygen is describing this.
Frontmatter (yellow section)
The frontmatter is delimited by a matching --- top and bottom with yaml in it, where we define the template metadata.
With to: app/hello.js we define to generate a file hello.js into a folder app/ in our root source. Very simple!
Template Body
At the template body, we define what content the new file which we defined in our template Frontmatter would have. When you compare the new file /app/hello.js with our template body you see, it is 1:1 the same content.
I think now we have everything we need to start editing our template this way, that we create in the end a new Vue component.
Create Vue component
We know from the structure of our Vue project that all components stay in our folder /src/components. Nice, we have now our Frontmatter section which will be
to: src/components/NewComponent.vue
Should work. And now we will copy&paste the dummy component from our existing project to the template body, that we get a template file like this
---
to: src/components/NewComponent.vue
---
<template>
  <div class="new-component">
    <h1>My new Vue Component</h1>
  </div>
</template>
<script>
  export default {
    name: "NewComponent",
    props: {
      msg: String
    },
    methods: {}
  };
</script>
<style scoped>
</style>
I removed only some things we don’t need in our new component like the CSS styles and changed the name and edit some things in the template section.
Ok. Let us start hygen to build our new component.
hygen vue-component new
You get now a result from CLI like

and you have a new file in your project like this
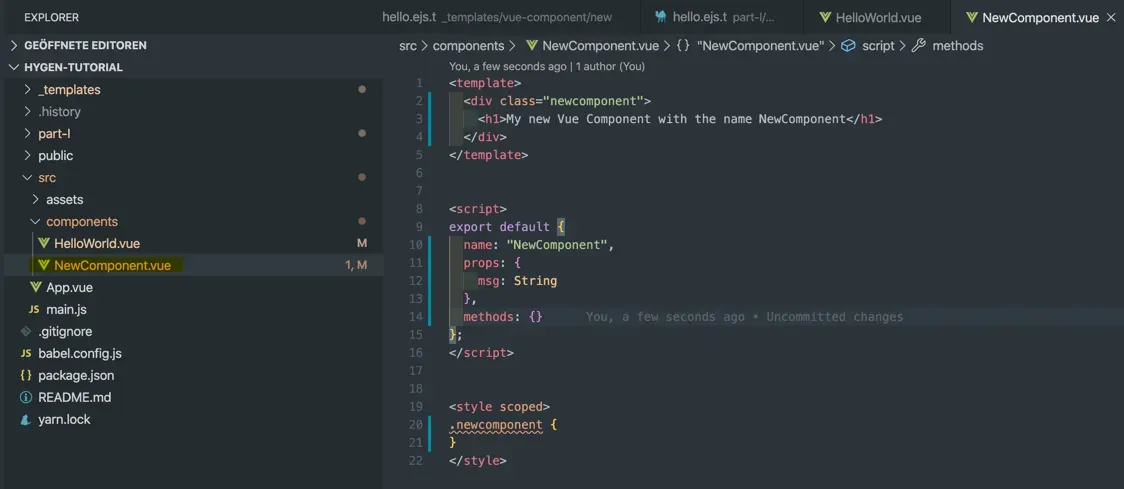
Awesome!!!! Very easy, right! But we are not finished right now! There are some problems which we must solve before.
Problems
Ok, what problem we will have now. Please try to build another new Vue component with hygen.
hygen vue-component new
What you think will happen?
Right, we try every time to create a new file with the same name called NewComponent.vue in our folder /src/components. And here we get a conflict and hygen ask us to overwrite our existing file

We need here a little bit more magic and make it more dynamic. But don’t be afraid now. It is very simple to fix this.
Make our template dynamic
Ok, what should be dynamic in our template?
- Of course, the filename
- Would be nice to set the new filename also into our template where Vue define the component name
- [optional] Set a class name into the template and style section
For our changes hygen supports variables. We will now set a variable “name” into our template with a syntax like <%= name %>.
---
to: src/components/<%= name %>.vue
---
<template>
<div class="<%= name.toLowerCase() %>
">
<h1>My new Vue Component with the name <%= name %></h1>
</div>
</template>
<script>
export default {
name: "<%= name %>",
props: {
msg: String
},
methods: {}
};
</script>
<style scoped>
.<%= name.toLowerCase() %> {}
</style>
Great! You can see that I edit also our new variable a little bit and bind normal JavaScript functions like to it. You can do a lot of things in your template with variables. A good overview you can find in the documentation of hygen here. And now you can start to create a new component with hygen like this way
hygen vue-component new --name AnotherVueComponent
with our variable “name” which you set at the end of the statement with a double dash, an empty space and by following a new name of the component which you will create.

It works!!! Let us try it again.

Your project structure should look now like this
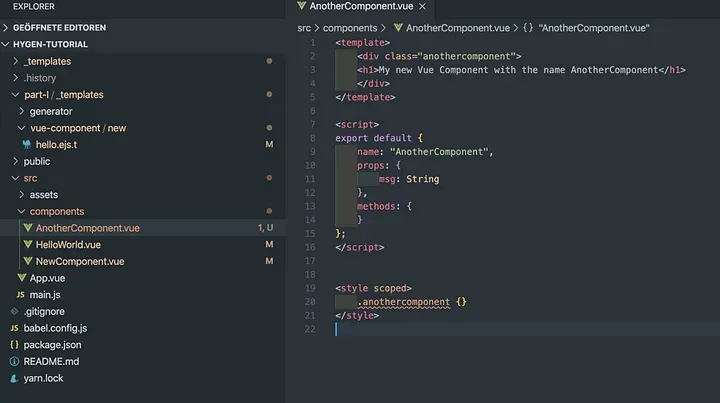
Congratulation! You have now a dynamic template to create a new Vue component. Bye-bye copy&paste!
In the next part of this series, I will show you how hygen with the “with-prompt” way and how much you can do dynamic things in your template. The next part will be online next week on Tuesday #tutorialtuesday!
You can find all code here at the folder part-I .
You will find more in the next parts: